

Section 1: Inventory & Item Management
1. Create a New Item
-
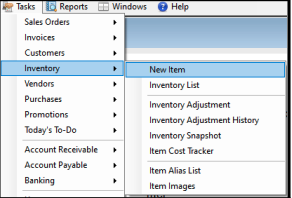
Navigate to Tasks > Inventory > New Item.
-
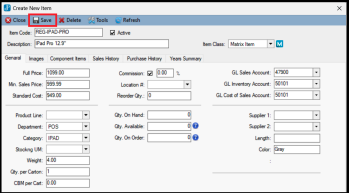
Input the item code, description, class, full price, and other required details.
-
Images: Go to the Images tab and double-click the background to upload a picture.
-
History: View historical data by selecting the Sales History, Purchase History, or Years Summary tabs.
-
Barcodes: To add an alias barcode, go to the BarCode Alias tab, right-click the table, select Add Alias, enter the barcode, and click OK.
-
Click Save.
2. Add Sales Promotions
-
Navigate to Tasks > Promotion > Sales Promotions.
-
Select New, then enter the promotion’s title, sales date range, and eligible items.
-
Enter the Markdown Price and click Save.
3. Send a Promotion Text Message (SMS)
-
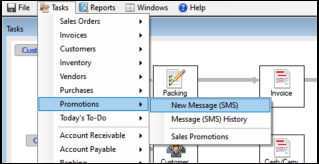
Navigate to Tasks > Promotions > New Message (SMS).
4. Export Your Item List
-
Navigate to Tasks > Inventory > Inventory List.
-
Go to Tools > Export.
-
Enter a file name and save the file type as an Excel spreadsheet (
*.xls).
5. View Inventory Snapshot (This report lists all products in your inventory at a specific point in time).
-
Navigate to Tasks > Inventory > Inventory Snapshot.
-
Select the specific item(s) and date range to view the report.

6. Set Item Tax Percentage
-
Navigate to Tasks > Inventory > Inventory List.
-
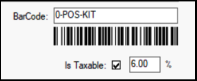
Select an item, check the Is Taxable box, and enter the specific tax percentage.
Section 2: Customer Management
1. Add a New Customer
-
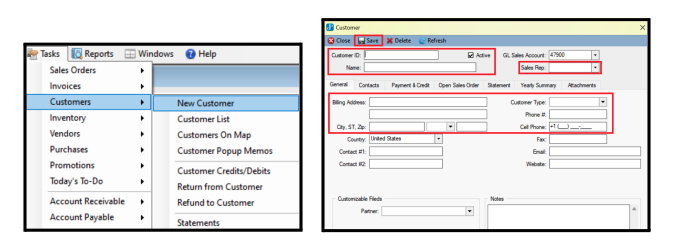
Navigate to Tasks > Customers > New Customer.
-
Enter the customer's general information, select their Sales Rep, and define the Customer Type. Click Save.
-
Contacts: Go to the Contacts tab to add the person in charge.
-
Payment: Go to the Payment & Credit tab to set up payment methods.
-
History & Reporting: Use the Open Sales Order, Statement, and Yearly Summary tabs to view their purchasing activity.
-
Documents: To attach a document, go to the Attachments tab, right-click the table, select Upload > Add File, choose your file, and click Upload Files.
2. Edit Customer Information
-
Navigate to Tasks > Customers > Customer List.
-
Double-click on any customer to open and edit their profile.
3. View 1-Year Customer Record
-
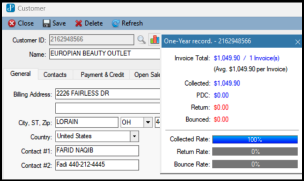
From the Customer List, double-click to select a customer.
-
Click the Stats Icon located next to the Customer ID to view their annual metrics.
4. Add Multi-Locations for One Customer
-
From the Customer List, set the Customer Type to Multi.
-
Go to the Contacts tab and click the green [ + ] button next to the "Select a contact" box.
-
Enter the new location information and click Save. (Note: To switch between locations, click the down arrow next to the contact box and select the specific store.)

5. View Customer-on-Map
-
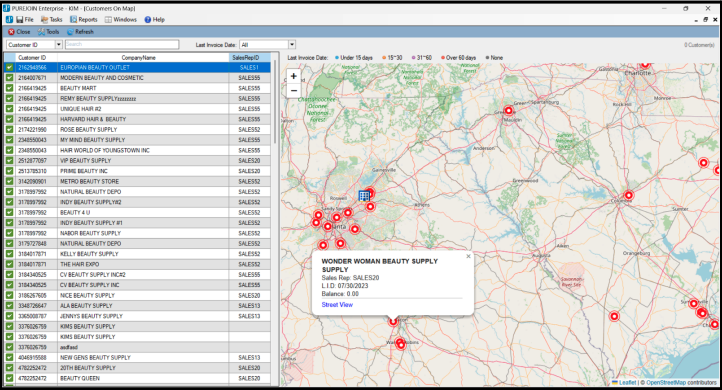
Navigate to Tasks > Customers > Customers on map.
-
Click on a red dot to view that customer's location, balance, last invoice date, and assigned sales rep.
Section 3: Vendor & Purchase Orders
1. Add a New Vendor
-
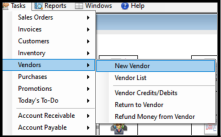
Navigate to Tasks > Vendors > New Vendor.
-
On the General tab, enter the vendor's information and select the assigned Purchase Rep.
-
On the Purchase Info tab, add their payment and shipping methods.
-
Use the additional tabs (Open Purchase Order, Account History, Payment Summary, Vendor Journal) to manage the vendor relationship.

2. Create a Purchase Order (PO)
-
Navigate to Tasks > Purchases > New Purchase Order.
-
Select your Vendor.
-
Look up the desired item(s), enter the quantity, and click Apply.
-
Click Save.

3. Mark a Purchase Order as Received
-
Navigate to Tasks > Purchases > Receiving Purchased Items.
-
Select the specific Purchase Order number.
-
Enter the exact amount of items received and click Commit.
-
Type YES in the pop-up confirmation box.
Section 4: User Management
1. Create a New User
-
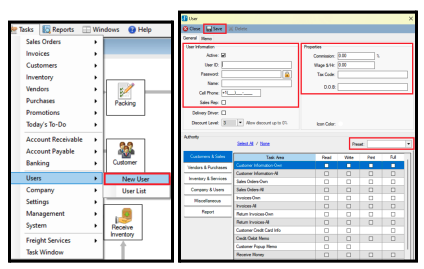
Navigate to Tasks > Users > New User.
-
Enter a User ID, Password, and basic user information.
-
Under Properties, enter their Commission %, Wage per Hour, Tax Code, and Date of Birth.
-
Set the User's Authority under Sales Preset:
-
Administrator: Full access to all Task Areas.
-
Other Presets: Restricted access to specified Task Areas.
-
-
If the user is a sales rep, ensure the Sales Rep box is checked. Click Save.
2. View User Auditing
-
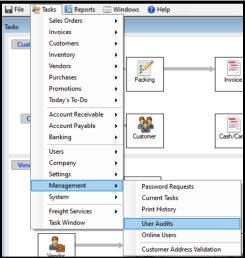
Navigate to Tasks > Management > User Audits to view real-time activity for the past 6 months.
Section 5: System Settings
1. Categories & Departments
-
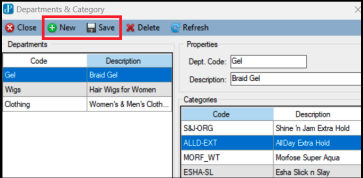
To add a Department: Go to Tasks > Settings > Categories. Click New, enter a Dept Code and Description, then click Save.
-
To add a Category: Double-click a Department code, double-click the blank area on the right table, enter the Category code and description, and click Save.
2. Payment Terms
-
Go to Tasks > Settings > Terms. Click New, enter a Code and Description, and click Save. Right-click any term to delete it.

3. Shipping Options (Ship Via)
-
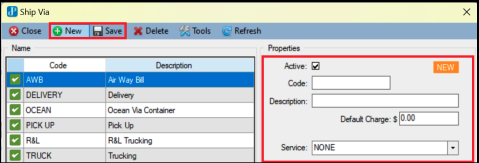
Go to Tasks > Settings > Ship Via. Click New, enter the Code, Description, Default Charge, and Service option. Click Save.
4. Dimensions & Packing Boxes
-
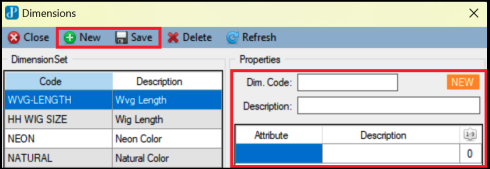
Dimensions: Go to Tasks > Settings > Dimensions. Click New, enter the Code, Description, Attribute, and Quantity. Click Save.
-
Boxes: Go to Tasks > Settings > Packing Boxes. Click New, enter the box measurements, and click Save.
5. Reason Codes
-
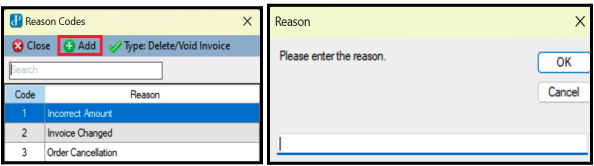
Go to Tasks > Settings > Reason Codes. Click New, enter the reason description, click OK, then select the Reason Code Type and click Save.
6. Barcode Scanner Configuration
-
Go to Tasks > Settings > Barcode Scanner. Check the box for your scanner type and click Save. Use the Test button to scan a barcode and verify the connection.

Section 6: Freight & Shipping Services
1. Track Shipments
-
Navigate to Tasks > Freight Services > Shipment Tracking.

2. Create a Return Label
-
Navigate to Tasks > Freight Services > Create Return Label.
-
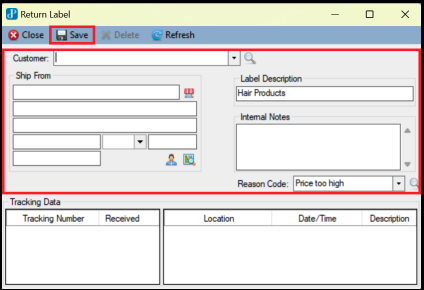
Select the Customer, enter a Label Description, choose a Reason Code, and click Save. (Note: View generated labels under Tasks > Freight Services > Return Label).
3. Freight Rate Checker
-
Navigate to Tasks > Freight Services > Freight Rate Checker.
-
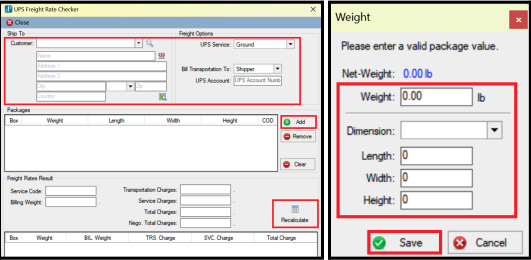
Select the Customer, UPS Service, and Billing options.
-
Click Add, enter the Net-Weight, select the Dimensions, and click Recalculate to view the rate.
Section 7: Sales Orders & Invoicing
1. Cash & Carry (In-Store Orders)
-
Navigate to Tasks > Invoices > New Invoice - Cash & Carry.
-
Select the Customer, look up items, enter quantities, and click Apply.
-
Select Create Invoice, then choose the customer's payment method.

2. Create & Pack a Sales Order
-
Create: Navigate to Tasks > Sales Orders > New Sales Order. Select the customer and items, click Apply, then Save.

-
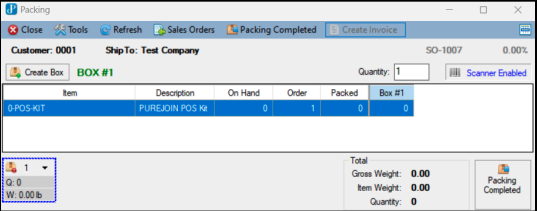
Pack: Navigate to Tasks > Sales Orders > Packing. Select the open order.
-
Scanner Enabled: Scan items to pack them.
-
Scanner Disabled: Manually enter the quantity in the box.
-
-
Select Packing Completed and confirm with Yes.
3. Generate Invoices
-
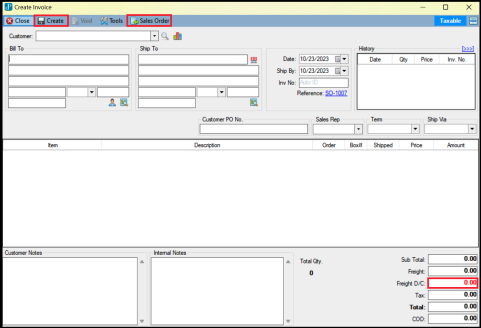
Standard Invoice: Go to Tasks > Invoices > New Invoice. Select the Open Sales Order. (Enter 'Freight D/C' to print UPS labels). Click Create and print the invoice.
-
Return Invoice: Go to Tasks > Customers > Return from Customer > New. Select the customer and the items being returned.
Section 8: Financial Operations (AR, AP, Banking)
Accounts Receivable
-
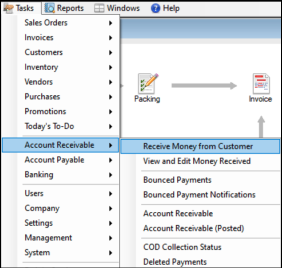
Receive Money: Go to Tasks > Account Receivable > Receive Money from Customer. Select the customer, enter the amount, select a payment method, and click Save.
-
Bounced Payments / AR List: View these reports under Tasks > Account Receivable.
-
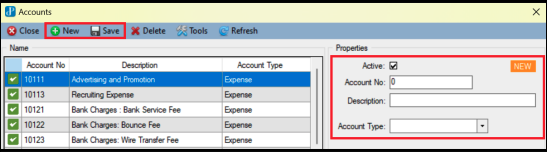
Financing Account: Go to Settings > Accounts > New Account. Enter the details and click Save.
Banking
-
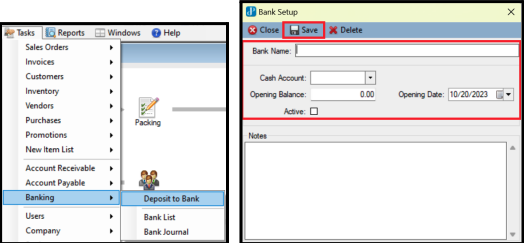
Create Account: Go to Tasks > Banking > Bank List > New Bank. Enter the details, set an opening balance, check "Active", and click Save.
-
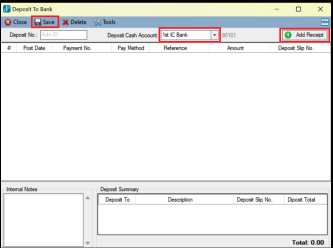
Deposits: Go to Tasks > Banking > Deposit to Bank > New Bank Deposit. Select the cash account, add the receipt, and apply.

-
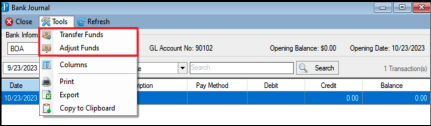
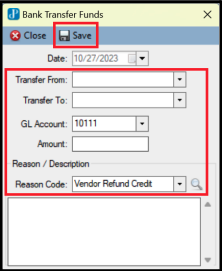
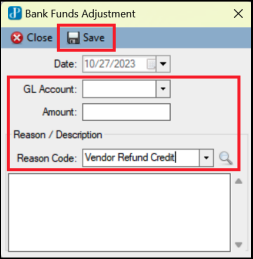
Transfers / Adjustments: Go to Tasks > Banking > Bank Journal. Select a bank from the dropdown. Go to Tools and select either Transfer Funds or Adjust Funds.

Accounts Payable
-
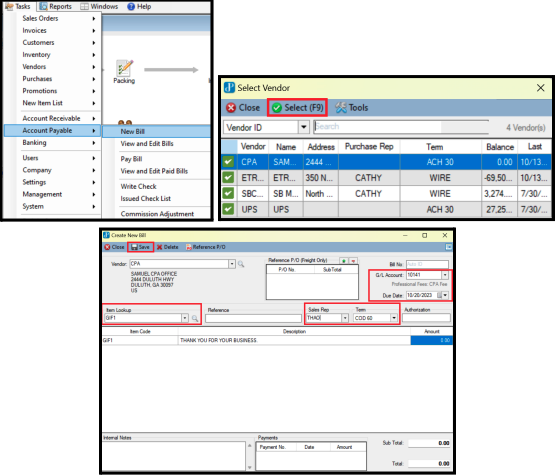
Create Bill: Go to Tasks > Account Payable > New Bill. Select the Vendor, Cash Account, and Payment Method. Click Save.
-
Pay Bill / Write Check: Go to Tasks > Account Payable > Pay Bill (or Write Check). Follow the prompts to select the vendor and apply payment.


-
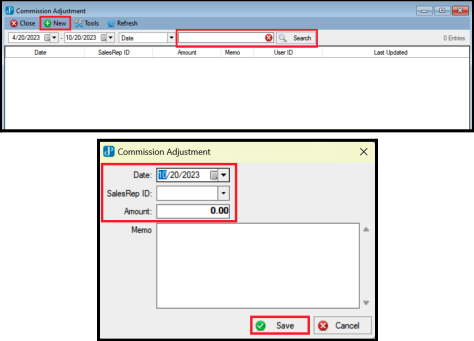
Commission Adjustments: Go to Tasks > Account Payable > Commission Adjustment. Click New, select the SalesRep ID, enter the amount, and click Save.
Section 9: Mobile App & Troubleshooting
1. PUREJOIN Enterprise App Setup
-
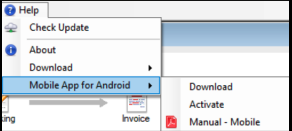
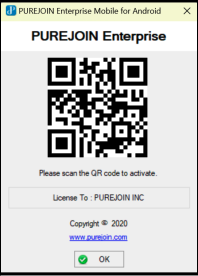
Install: Go to Help > Mobile App for Android > Download. Scan the QR code, open the file, and install the app on your device.
-
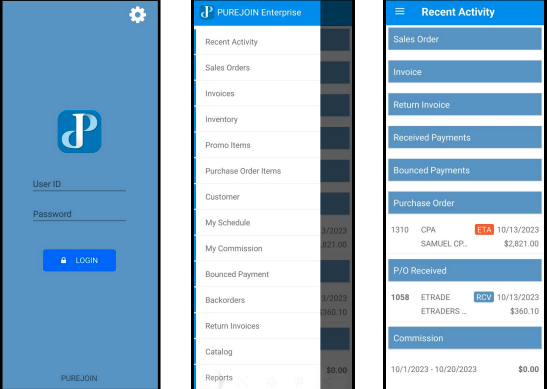
Activate: Open the app, enter your User ID and Password, and press Login. Scan the system QR code, then press Login again.
2. Troubleshooting & Support
-
Lost Password: If a user forgets their password, an Administrator must log in, go to the User List, select the user, and click View/Change password.